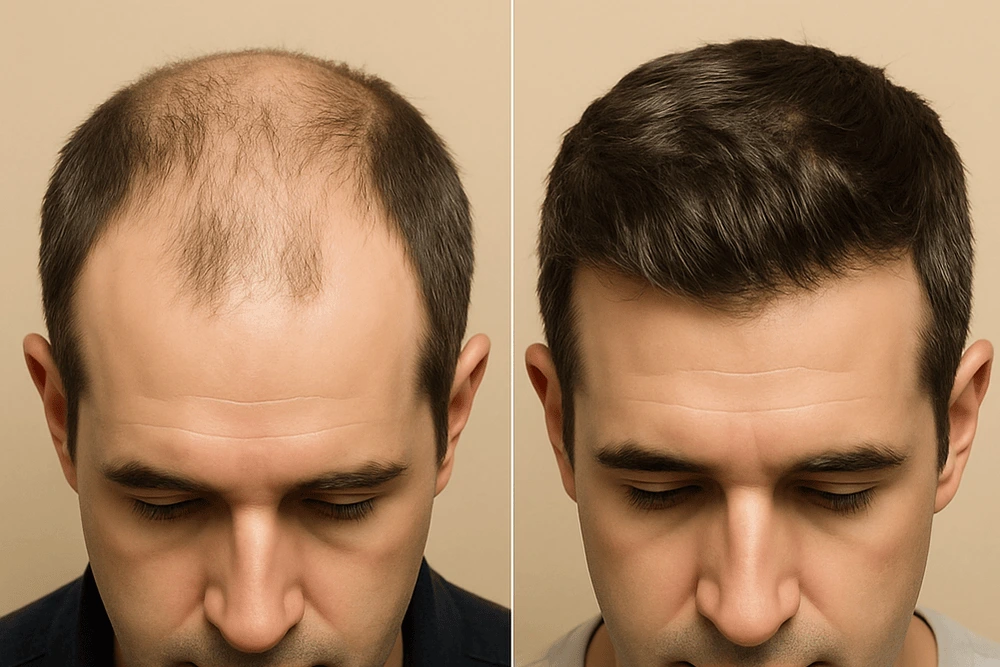
Choosing a clinic? Learn how to decode results like a pro. In this guide, you’ll master hair transplant before after evaluation using objective photo standards: lighting, angles, timing, density illusions, and donor preservation. Use this checklist to separate marketing gloss from medically credible outcomes—before you pay a deposit.
Know a friend on the fence? Share this photo-standards checklist before they book.
Quick Take
Match the basics: same lighting, camera distance, and angles in both shots—or the result isn’t comparable.
Time matters: judge “afters” at 10–12 months (hairline/mid-scalp) and 12–18+ months for the crown; earlier pics can mislead.
Grooming parity: compare with similar hair length and no fibers/dyes; wet vs dry can fake a difference.
See the donor, too: insist on donor-area afters (short hair) to rule out overharvesting or visible scarring.
Design realism: natural hairlines use single hairs at the edge and show subtle micro-irregularities—not a straight wall.
Proof over hype: request graft count + hairs/graft, technique (FUE/FUT), and surgeon name; rate each case with a hair transplant before after evaluation checklist.
Related reading: Before You Choose a Hair Transplant Surgeon • Clinic Due Dilligence Checlist • Board-Certified vs. Technician-Led Clinics • How to Choose the Best Hair Transplant Clinic
Why Photo Standards Matter
Before/after photos are often your only window into a clinic’s true performance. But images can mislead—on purpose or by accident—through lighting tricks, haircut changes, wet vs. dry styling, or cropping away donor damage. A consistent, surgeon-led gallery should make it easy to compare like-for-like.
The Gold Standard: How Before/After Sets Should Be Captured
- Same lighting: neutral, even light (no harsh backlight or shadows).
- Same camera + distance: identical focal length and field of view to avoid magnification bias.
- Same angles: front, both temples, top (mid-scalp/crown), and donor (occipital/parietal) views.
- Same grooming: similar hair length, no heavy fibers, gels, or dyes that hide miniaturization.
- No hats/headbands: bare scalp views, especially for hairline and crown.
- Bare skin where relevant: beards/eyebrows if those areas were transplanted.
- Time-stamped: clear surgery date and follow-up dates (3, 6, 12, 18 months).
- High resolution: pores and hair caliber should be visible (not smoothed or over-compressed).
Quick rule: if angles, lighting, or length don’t match, the “after” is not directly comparable.
Timing: When “After” Is Truly “After”
- Early months (1–3): shedding phase; meaningful growth hasn’t started.
- Month 4–6: early growth; coverage improves but caliber is immature.
- Month 10–12: typical “result reveal” for most hairlines/mid-scalp.
- Month 12–18+: crown often matures later; final caliber/shine appears.
A credible gallery labels timelines clearly. If you only see 3–6 month photos, treat claims cautiously.
Angle-by-Angle: What To Look For
Hairline (frontal)
- Symmetry & micro-irregularity: natural hairlines have soft, feathered edges—not ruler-straight walls.
- Caliber mix: singles at the edge, doubles/triples behind; avoids “pluggy” look.
- Temple recession: improvements should respect age-appropriate patterns; extreme “youthful” temples can look unnatural over time.
Mid-scalp (top)
- Spread vs. density: watch for combed-forward tricks. Look at part lines and scalp show through.
- Consistency: density should transition naturally across zones (no sharp “islands” of density).
Crown (vertex)
- Swirl orientation: should respect your natural whorl.
- Honest lighting: the crown is unforgiving; demand identical lighting/angle to judge coverage.
Donor Area (critical and often hidden)
- Uniformity: no patchy overharvest or “moth-eaten” look.
- Safe zone respect: extractions stay within the permanent zone; edges are blended.
- FUT scar (if applicable): flat, thin, and well-closed; check multiple hair lengths, including short.
If the gallery never shows donor afters, that’s a serious red flag.
Common Photography Tricks (and How to Defuse Them)
- Different hair length: longer, thicker after-photos hide scalp show—compare with similar length.
- Wet vs. dry: wet makes thinning obvious; if “before” is wet and “after” is dry, you’re not seeing a fair comparison.
- Harsh overhead lights: can exaggerate thinning in “before.”
- Camera distance: standing closer for the “after” makes hair look denser; compare ear-to-ear scale or background objects.
- Fibers/camouflage products: look for matte “powdery” finish or unnatural uniform color. Ask if any products were used.
- Selective angles: only showing flattering sides or avoiding crown/donor.
Density Illusions vs. Real Coverage
- Caliber matters: thicker shafts reflect light differently and appear denser even at the same graft count.
- Directionality: recipient-site angles should allow hair to “shingle” and cover; mis-angled sites create gaps.
- Contrast effect: dark hair over light scalp appears thinner than low-contrast combos; the surgeon should account for this in planning.
Donor Preservation: The Hidden Half of Every “After”
Outstanding “afters” mean little if the donor is depleted. Judge sustainability:
- Extraction pattern (FUE): evenly dispersed, no banding or clusters; punch size appropriate to minimize scarring.
- Graft selection: avoids over-harvesting finer “miniaturizing” follicles.
- FUT planning: scar placement in the safe zone, proper closure technique; option to combine FUT + FUE over time to conserve donor.
- Long-term plan: galleries with multi-year follow-up show both recipient stability and donor integrity.
What Real Consent & Metadata Look Like
- Case context: age, hair loss pattern (Norwood/Ludwig), hair caliber, donor density, medical therapy status.
- Graft details: number of grafts and hairs/graft; technique (FUE/FUT), punch size or strip width; number of sessions.
- Operating surgeon: named, with credentials; assistants’ roles clarified.
If a clinic can’t provide this context upon request, downgrade their claims.
The 10-Point Hair Transplant Before After Evaluation Checklist
- Same lighting, camera, distance, and angles.
- Timeline shown (≥12 months for hairline/mid-scalp; ≥15 months crown).
- Donor afters included (FUE pattern or FUT scar at multiple hair lengths).
- Grooming parity (no fibers/dye differences).
- Case-matched (similar hair type, age, pattern).
- Hairline design natural (micro-irregularity, singles at edge).
- Coverage realism (part lines, crown swirl respected).
- Density honesty (no comb-overs or only one flattering angle).
- Clinical context (grafts, hairs/graft, technique, surgeon named).
- Multi-year follow-up where possible.
Print this, keep it next to your screen, and rate each case 0–10.
Smart Questions To Ask The Clinic
- Were any fibers or concealers used in these photos?
- Can I see the donor afters at short hair length?
- What is the time since surgery in each after? Do you have 12–24+ month updates?
- How many grafts and hairs/graft were transplanted, and what’s the donor reserve left?
- Who performed extractions and recipient-site incisions?
See Top-Rated Clinics
Prefer a diagnosis-first approach? Browse neutral, vetted clinics that manage genetic hair loss with medical therapy (and surgery if needed). Filter by credentials, outcomes, and follow-up care. → See top-rated clinics
Hair Enhancement Resources & Guides
- Hair Transplant Cost Comparison — understand what you’re paying for and why.
- Effective Non-Surgical Hair Restoration Methods — optimize outcomes before/after surgery.
- Everyday Hair Care Routine To Prevent Hair Loss — protect what you’ve got.
- Microneedling for Hair Growth — frequency, needle size, and evidence.
FAQ
Bottom Line
Great galleries make truth easy to see. Use this hair transplant before after evaluation checklist to judge consistency, timing, donor integrity, and design realism—then decide. If a clinic can’t provide matched photos and context on request, walk away and keep your options open.
Was this useful? Share this photo-standards guide so others can judge results fairly and book with confidence.
References
- International Society of Hair Restoration Surgery (ISHRS) — consumer education & photo guidance
- British Association of Hair Restoration Surgery (BAHRS) — patient advice on choosing surgeons
- NHS — hair transplant overview, risks & recovery timing
Medical Disclaimer: The content on hairimplants.net is for informational purposes only and should not be considered medical advice. It does not replace a professional medical consultation, diagnosis, or treatment. Readers are encouraged to seek guidance from a qualified healthcare provider before making any decisions about hair restoration treatments. Hairimplants.net accepts no liability for actions taken based on the information provided.
Affiliate Disclosure: Hairimplants.net may contain affiliate links. If you click a link and make a purchase, we may earn a small commission at no additional cost to you. This helps us keep our content free and research-based. Our editorial opinions are independent and not influenced by partnerships. We do not accept payment for favorable reviews or rankings. Links to medical sources are non-affiliate.


